BETTER SECURITY = BETTER SEO, WHO WOULD HAVE THOUGHT?
If you've recently purchased an SSL certificate for your website (more than likely for an eCommerce website) you're securing a portion of your website and that's great. If you've recently purchased an SSL cert and are not using it to secure your entire  website... then shame on you. You're paying for it, use it! In this how-to guide we go over how to ensure your entire website (including the admin pages) is utilizing the SSL line for maximum security.
Turns out, security is also great for SEO. Google recently decided that it would start giving a nice little SEO score boost to website using SSL/HTTPS. So there really is no good reason to not secure your WordPress site. Not only will this guide enhance the security of those traversing your site, but will give your web pages a nice little SEO boost. 2 birds, 1 stone, let's begin.
Looking for more great articles on WordPress Security? Check out these posts from our blog!
- 5 reasons to use WordPress in your next Redesign
- Using Chrome to ID non-secure Elements on your Website
- One Step to a Safer WordPress Website
FORCE HTTPS ON ALL PAGES - WORDPRESS
Time to get to work. If you've purchased an SSL line and installed it on your server then you're well on your way. Use this guide apply your SSL line accross all pages on your website.
things you'll need in this tutorial:
- SSL certificate installed and running on the target URL - these can be purchased a variety of places (we recommend Digicert!)
- FTP access to your website files. The reason for this is 2 fold - one, we'll need to modify your wpconfig file and two we'll need to get at your website's .htaccess file during this process
- Access to your WordPress admin (and administrator privileges to access the full "Settings" tab).
- A website running on a server with Apache. (Windows or Linux, Apache is for both. This pertains to the .htaccess file we'll modify.)
step 1: backup your website!
It seems so obvious but people, we've found that for many that it just isn't. Before you do any major modifications to your website, please please please, back it up. Back up your database, back up your site directory and files, back up everything. The last thing you want is to make a mistake while changing your site configuration and lose access, or worse, lose all your hard work. Take the 20 minutes, back it up.
Step 2: Securing your wordpress admin pages
The most logical first step is securing your admin pages. This is probably the easiest part of securing your entire WordPress site as it can be done by a simple modification to the wpconfig file that is found in the directory with all your WordPress files.
- Log on to FTP using a program like Filezilla or SmartFTP (they are both free and easy-to-use).
- Navigate to the directory containing your website folder, locate the wp-config.php file and download it.
- Open the wp-config.php in any text editor like wordpad (PC) or textedit (mac) - it should look something like the image below depending on your version:

If the code is there, but is hashed out (has /** before and after the line). You'll need to un-hash it before the server will recognize it. The example shown above is 'un-hashed'.
define('FORCE_SSL_ADMIN', true);
If it's missing, copy the code provided above and paste it into your wp-config.php file. Save it and upload it to your server in the same directory (overwrite the existing file). To test this setup and to verify that your admin pages are now secured with https, go to your WordPress login page, type in your user name and password and log on. Look up at the top of your browser, in Chrome if you're secure you should see the little green padlock show up or at the very least https in front of the URL. It should look like this:

NOTE: If you're unable to log into your WordPress admin after you made your changes to the wp-config.php you either made a syntax error when modifying the config, or your SSL cert is not installed or set up properly. Double check your syntax in your wp-config.php and if you're still having issues, undo the changes you made in Step 1 and either post your question below in our comments section or contact your system administrator for help.
Step 3: Switch your wordpress url's from http to https
Now that you've secured your admin pages, it's time to secure your public pages. This is where full admin access is required.
- In your WordPress admin dashboard navigate to the 'Settings' tab on the left navigation bar.
- Find where your site URL is shown. It should be listed in 2 different places as shown in the example below.
- Change the beginning of both URL's from 'http://' to 'https://'. This will tell WordPress to access all the media and different elements using https instead of http, which is important to ensuring all elements are loading securely.

NOTE: Sometimes when you make changes to the site URL's, you can get kicked out of the admin pages. This is normal so don't worry, just go to your login page and make sure you can get back into your admin pages.
Step 4: modify .htaccess to redirect for https
Now that you've made your WordPress website ready for https, it's time to send your visitors to the secure version of your site. If you've operated your website for a while on 'http' there could be a lot of links to your site with that prefix. That's not a problem, we can make sure that all traffic coming into your site is always secure using the .htaccess file located on your server.
- Go back to your FTP client and login to your server. In the same directory that we found the wp-config.php file you should be able to located a file called .htaccess. If you don't have an htaccess file, that's ok, you can easily create one. However, if you're running Apache on your server it should be in there by default.
- For this step, you'll more than likely want to right click on the file and select 'view/edit'. This is especially useful if you're on a Mac as the Mac system will recognize this as a system file and will be difficult to locate in 'Finder'. If you do want to download it on Mac, you'll have to locate it and modify it using the FTP client as it will show system files.
- When you open your .htaccess file, by default on a WordPress system it should look like this:
<IfModule mod_rewrite.c>
RewriteEngine On
RewriteBase /
RewriteRule ^index\.php$ - [L]
RewriteCond %{REQUEST_FILENAME} !-f
RewriteCond %{REQUEST_FILENAME} !-d
RewriteRule . /index.php [L]
</IfModule>
# END WordPress
- Add the following lines to your .htaccess file in order to redirect all incoming traffic to 'https':
RewriteRule (.*) https://%{HTTP_HOST}%{REQUEST_URI} [R,L]
- Your end file should look something like this:

- Save the .htaccess and re-upload it to your server (overwrite if needed).
- Test that your new rule is working by opening a browser window and typing in your URL with the prefix 'http://'. You should be automatically re-directed to your same URL on 'https'.
Step 5: test and evaluate
- Now comes the time to test the work you've done by visiting all your web pages to make sure they are showing up as secure. If you're getting the green padlock on all pages you're good to go! You're WordPress website is now fully secure. If you're not seeing the green padlock showing up, refer to 'FIX 1' in 'Step 5'.
- Try uploading a large .JPG file or a larger video file to your 'Media' section in your WordPress admin dashboard. If you're uploads are timing out, failing, or giving you an error message, refer to 'FIX 2' in 'Step 5'.
step 6: two very important fixes!
FIX 1:
You may notice that on some or all pages, you're not seeing the little green padlock in your browser. Instead you see something like this:
FIX 2:
THANKS FOR READING!
This was a lenghty post so we really appreicate you staying until the end, we hope that you were able to follow these steps and acheive a new level of security on your WordPress website. If you have any additional questions or would like clarification on a step for any reason please leave you questions and comments below and we'll respond within 24 hours - that's a guarentee!
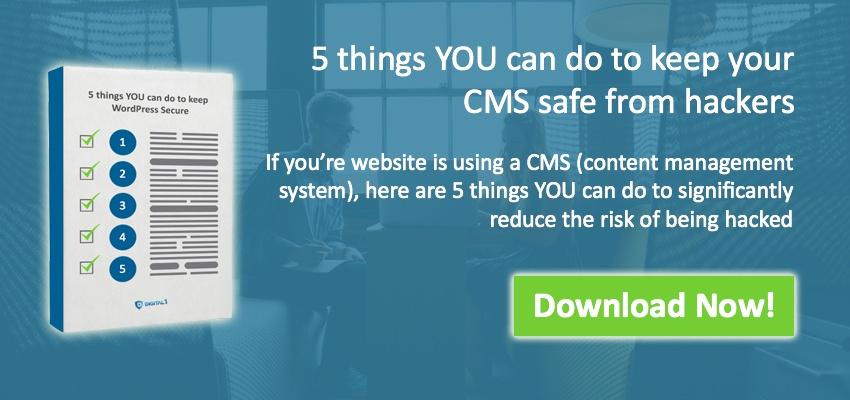
Also, be sure to check out our 5 Things You Can do to Keep your CMS (content managment system) Secure! No matter what CMS you're using, do these 5 things and greatly reduce your risk of being hacked.